During summer sessions, computer hardware is getting seriously hot
and needs our attention. The most common problem causing artefacts into
your screen is due to overheated graphics cards. Either passive (without
fan) or active (with fan) cooling, the optimum results stem from the
best fit between your GPU processor’s surface and its heatsink. Thus
many heatsinks are nickel-plated with a copper base block, or fully copper-plated if you pay some extra money.
Why copper? The answer is simple; it improves heat conduction and offers better cooling efficiency than the other common metals, such as aluminum or nickel. Furthermore, there is a tendency nowadays to use exotic shaped and bulky sized GPU coolers with several heatpipes; they quickly conduct heat from the chip’s surface to protect it from overheating during stressful situations. Personally, I prefer the watercooling solutions in combination with little ramsinks rather than buying a huge cooler limiting my case size and probably harming my tower’s airflow (and maybe its overall ambient temp).
In case you monitor your card’s temperature and notice that it exceeds 85 Celsius (under load – playing a game or running a stressful 3D application) then you have problem. Before it’s too late, you need to provide a sufficient cooling mechanism to your hardware, in order to operate under normal conditions. But if you think that your cooler is sufficient enough, then please try to replace the thermal paste. All GPUs are coming with low quality pre-applied TIM (thermal interface material), and this is what we are going to replace in the next paragraph.
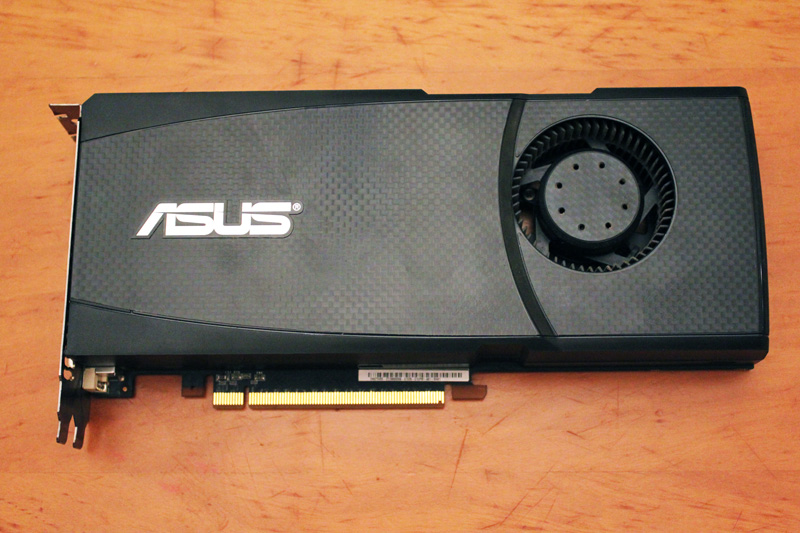 First things first, you need to remove your card’s plastic body using
any clips (look around the corners) or little screws. Here it’s my old
NVidia GeForce GTX 465 manufactured by ASUS Technologies.
First things first, you need to remove your card’s plastic body using
any clips (look around the corners) or little screws. Here it’s my old
NVidia GeForce GTX 465 manufactured by ASUS Technologies.
 Okay, now you need to find a way to remove the heatsink. In most
cases there are 6-8 screws that hold the heatsink above the GPU
processor. Use a screwdriver and remove the heatsink carefully without
scratching anything on the PCB.
Okay, now you need to find a way to remove the heatsink. In most
cases there are 6-8 screws that hold the heatsink above the GPU
processor. Use a screwdriver and remove the heatsink carefully without
scratching anything on the PCB.
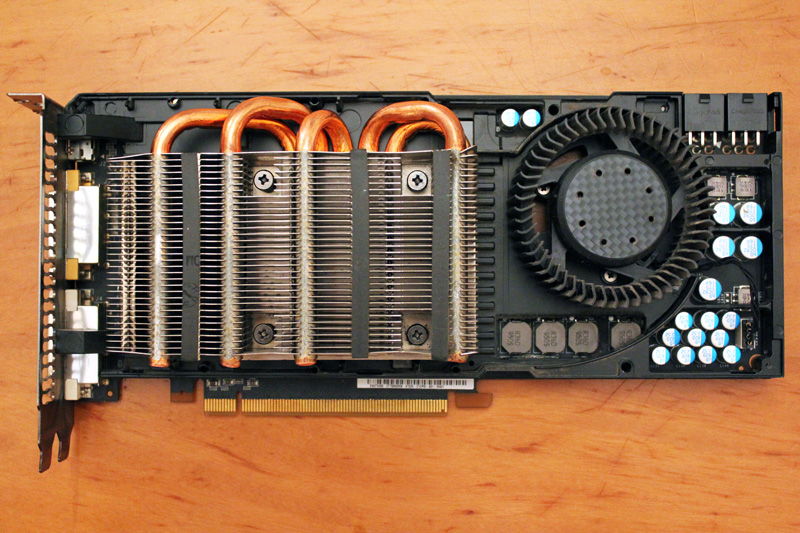
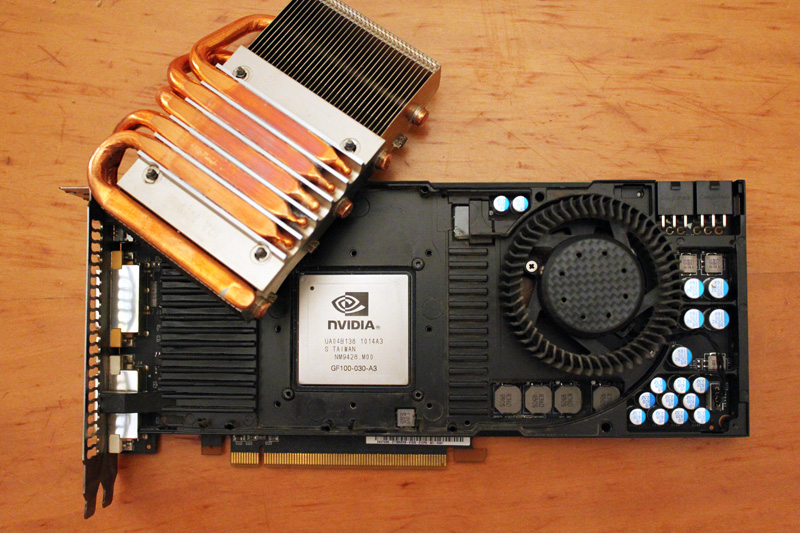 As soon as you remove the heatsink, you will see your card’s GPU
processor, hidden under the very centre of the heatsink. As you can see,
ASUS uses here a direct heatpipe cooling system, which means that the
heatpipes indirectly transfer the heat through the fins and finally the
big surface manages to dissipate the GPU heat successfully through the
fan.
As soon as you remove the heatsink, you will see your card’s GPU
processor, hidden under the very centre of the heatsink. As you can see,
ASUS uses here a direct heatpipe cooling system, which means that the
heatpipes indirectly transfer the heat through the fins and finally the
big surface manages to dissipate the GPU heat successfully through the
fan.
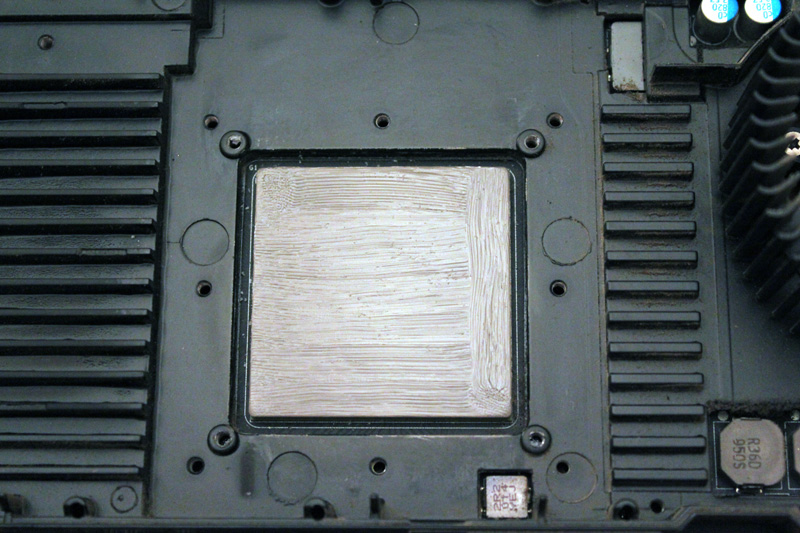
 Use a soft paper and highest percentage alcohol or Artic Clean in order to clean all the pre-installed TIM. Then, apply the thermal grease (eg AS5 or Ceramique) onto the surface of the GPU processor. After this, your chip should look like this:
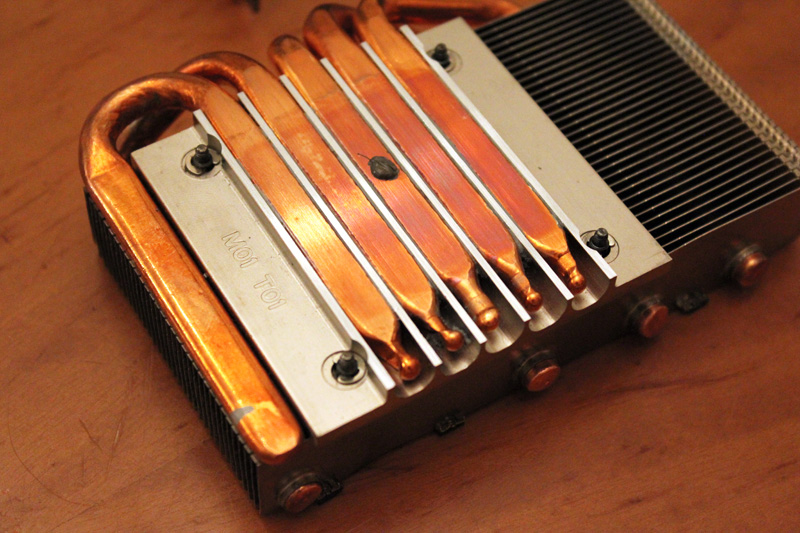
 Before putting the cooler back on the GPU processor, take this advice
and use a hairdresser to heat the copper-plated base of the heatsink.
Of course, there isn’t any reference inside the manual that advises you
to do that, so act independently. Let’s say that this is my personal
step in this procedure so far.
Before putting the cooler back on the GPU processor, take this advice
and use a hairdresser to heat the copper-plated base of the heatsink.
Of course, there isn’t any reference inside the manual that advises you
to do that, so act independently. Let’s say that this is my personal
step in this procedure so far.
 Now place carefully the heatsink in the very center of the GPU
processor. Insert the necessary screws through the mounting holes so as
to slide the washers onto them. Before moving on, make sure that all
screws are both fastened well, although it’s important not to screw them
massively tight.
Now place carefully the heatsink in the very center of the GPU
processor. Insert the necessary screws through the mounting holes so as
to slide the washers onto them. Before moving on, make sure that all
screws are both fastened well, although it’s important not to screw them
massively tight.
Final step is to place back the plastic body and fasten any clips that holds it on top of the card.
Okay, now you ‘re ready to test your little achievement. Plug your GPU back to your motherboard and start playing a game in order to put your graphics card under stressing situation. Simultaneously, please monitor your GPU temperatures (using lm-sensors) and after a couple of hours of gaming, see the log files. Normally, there will be a delta temp of -5 Celsius than before.
However, if you GPU is still hot then you need to check the fan. Many Linux drivers are not able to operate successfully the cycle fan duty, thus PWM technique fails. The best thing here is to try both available drivers for your GPU model, meaning open-source and proprietary version. In worst case scenario, you need to manually setup thermal thresholds and fix your cycle duty. For example, a rule would be: “if GPU temp exceeds 70C then put its fan at 80% RPM”. Try different combinations and see what works best for you. For example, trying 100% cycle duty is very loud and noise, so do not overestimate, because you will end up with a headache.
Why copper? The answer is simple; it improves heat conduction and offers better cooling efficiency than the other common metals, such as aluminum or nickel. Furthermore, there is a tendency nowadays to use exotic shaped and bulky sized GPU coolers with several heatpipes; they quickly conduct heat from the chip’s surface to protect it from overheating during stressful situations. Personally, I prefer the watercooling solutions in combination with little ramsinks rather than buying a huge cooler limiting my case size and probably harming my tower’s airflow (and maybe its overall ambient temp).
In case you monitor your card’s temperature and notice that it exceeds 85 Celsius (under load – playing a game or running a stressful 3D application) then you have problem. Before it’s too late, you need to provide a sufficient cooling mechanism to your hardware, in order to operate under normal conditions. But if you think that your cooler is sufficient enough, then please try to replace the thermal paste. All GPUs are coming with low quality pre-applied TIM (thermal interface material), and this is what we are going to replace in the next paragraph.
Final step is to place back the plastic body and fasten any clips that holds it on top of the card.
Okay, now you ‘re ready to test your little achievement. Plug your GPU back to your motherboard and start playing a game in order to put your graphics card under stressing situation. Simultaneously, please monitor your GPU temperatures (using lm-sensors) and after a couple of hours of gaming, see the log files. Normally, there will be a delta temp of -5 Celsius than before.
However, if you GPU is still hot then you need to check the fan. Many Linux drivers are not able to operate successfully the cycle fan duty, thus PWM technique fails. The best thing here is to try both available drivers for your GPU model, meaning open-source and proprietary version. In worst case scenario, you need to manually setup thermal thresholds and fix your cycle duty. For example, a rule would be: “if GPU temp exceeds 70C then put its fan at 80% RPM”. Try different combinations and see what works best for you. For example, trying 100% cycle duty is very loud and noise, so do not overestimate, because you will end up with a headache.